Note: This is the first of three posts about how I made my felt Advent calendar. For information on how I made the ornaments see Part 2; for instructions on how to make the calendar itself see Part 3.
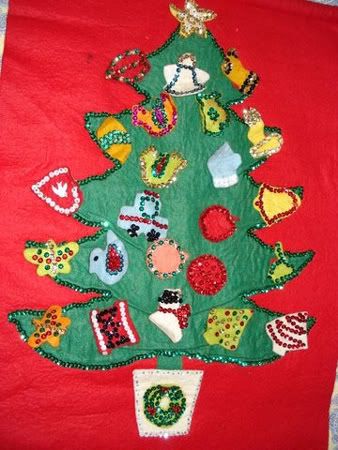
The project I'm currently working on is an Advent calendar (a calendar that counts down the days until Christmas). I'm using my family's Advent calendar as a guide - it was made for us by my paternal grandmother many years ago.

The original Advent calendar (showing the ornaments)

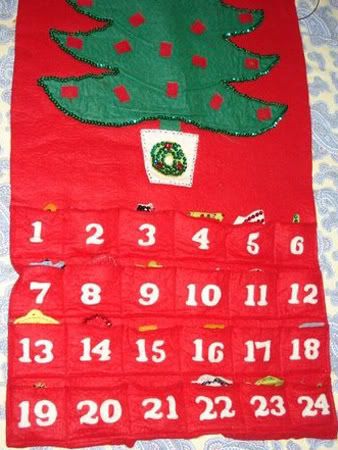
The original Advent calendar (showing the pockets)
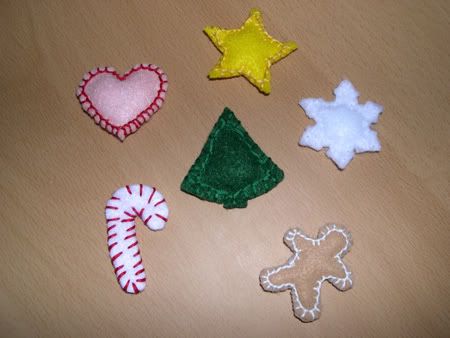
Unfortunately, due to the lack of crafting resources in my area, I'm having to deviate from the original quite a bit. The only sequins I could find in town were white and purple, so I'm having to go without. I was also unable to find red felt by the yard so I'm going to have a white felt background instead. Since the ornaments were my biggest problem I've started on them first. Here are a few of the better ones:

Hopefully they're all recognizable! If not, here they are clockwise from the bottom right: gingerbread man, candy cane, heart, star, snowflake and Christmas tree (in the center). They are made of two pieces of felt, stuffed with batting and with Velcro on the back. I used embroidery floss to sew the pieces together.
The sewing is pretty easy. The hard part is coming up with 24 different recognizable ornaments. Since I'm no good at embroidering details on them (I've tried, but it looks awful!), they have to be identifiable by their shape alone. I'm using the ornaments on the original Advent calendar as inspiration, but some of them would lose their meaning without the details sew on.
So far the other ornaments I have planned are: bell, candle, apple, piece of candy, car, train, ornament (you know, the old fashioned glass ones that are shaped like a turnip), and the letters in NOEL. That brings me to 17, so if anyone has suggestions for other ornaments, I'd love to hear them!
Update 11/15/07: I've finished all the ornaments! For photos and instructions, please see Advent Calendar Part 2 - Ornament Instructions.
Update 11/18/07: I've completed the entire calendar! For photos and instructions, please see Advent Calendar Part 3 - Complete Instructions.

I found your Advent Calendar project this evening while writing a post to my blog. Thanks for sharing. I have posted a link to your Advent Calendar on my blog today. Again, thanks for sharing this great project. Debra
ReplyDeleteYou're welcome Debra - glad you liked it!
ReplyDeleteYou did a great job of copying your family's Advent Calendar. I found it on another blog that linked to yours. I made this for my family about 38 years ago. How very fun to see the same ornaments again. We still use our tree!
ReplyDeleteThank you! I really loved the original calendar. It's neat to hear that others have the same one!
ReplyDeleteHow cool, the original calendar here is the same exact pattern my mom made! Mom and dad still set out their advent calendar every year; growing up, we four kids would take turns being the one to hang that day's ornament, so it has nostalgic value. =)
ReplyDeleteNostalgia is definitely why I wanted to make my own calendar! There was no way my parents would part with their calendar and I missed getting to put up the ornaments at Christmas. :)
ReplyDeleteThis is the same calendar I had growing up. My mum made it many many years ago and I have made one for my children. I always loved my turn to put up an ornament!
ReplyDeleteMe too, Dawn! :)
ReplyDelete