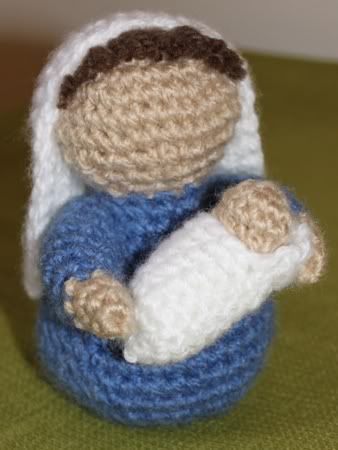
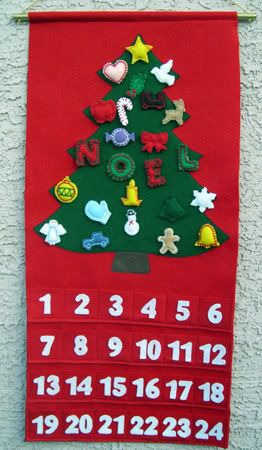
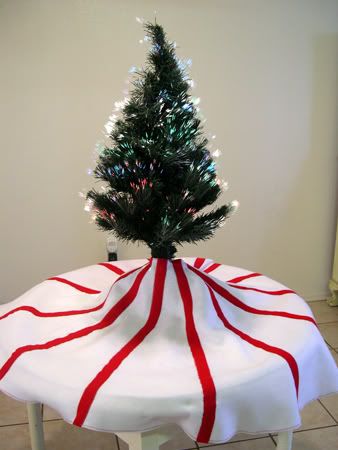
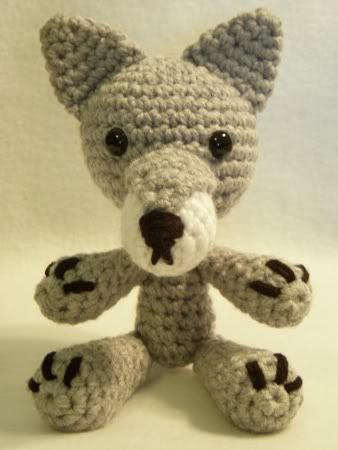
I thought I'd do a quick post reviewing the Christmas craft instructions and patterns from The Crafty Cattery. If you're looking for gifts to make for yourself or someone else, consider these!
Tuesday, December 07, 2010
Free Christmas Craft Instructions
Wednesday, October 27, 2010
It's NaNoWriMo Time Again!
NaNoWriMo is less than a week away! What's NaNoWriMo, you ask? It stands for National Novel Writing Month, which is a world-wide event that takes place every November where folks attempt to write a 50,000 word novel in a month.
I'm participating again this year (see this post for more information on what I did last year) and have been busy this week with my novel planning. It's going to be a challenge with my brother's wedding this month but I think I can do it. It helps that we don't have any plans for Thanksgiving so I can stay home and write!
If you're one of those people who has always wanted to write a novel but never got around to it, NaNoWriMo might be for you! Before NaNo last year I had never finished writing a short story, much less a whole book. Since then I have started writing more, including two short stories (one of which I entered in a contest and is posted here). I am very excited about my story this year and can't wait to start writing!
If you decide to attempt NaNoWriMo, look me up on the NaNo website so we can be writing buddies! My username there is Clockwise.
Happy writing!
P.S. I try not to make excuses for not posting new projects, but the reason I haven't had anything new for months is that I have been working on a very big project: an animated short film! Though I've been working on it since May I am only about halfway through and now because of NaNo it is getting pushed to the back burner. I hope to get it finished before the end of the year but that might be wishful thinking. Here's a teaser trailer I made to show to my friends who are the "actors" in the film (I felt bad about making them wait so long to see the finished product!).
Saturday, September 11, 2010
Tea Lovers' Roundup on Muffins and More
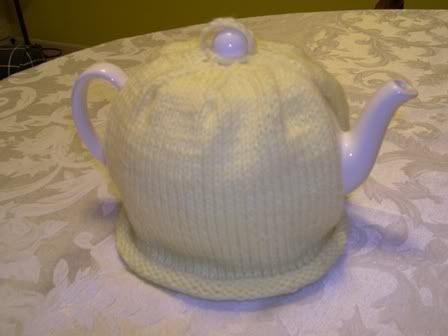
Ms Muffin of Muffins and More is doing a Tea Lovers' Roundup this month where she features a different tea-related project each day. I'm happy to say that today's project is the Knitted Tea Cozy I made for my dad! Check it out, and while you're there take a look at all the other Tea Lover's projects. My favorite so far is the first one - cupcakes baked in tea cups. How adorable!
Thursday, August 19, 2010
Makin' Bacon: A Short Story
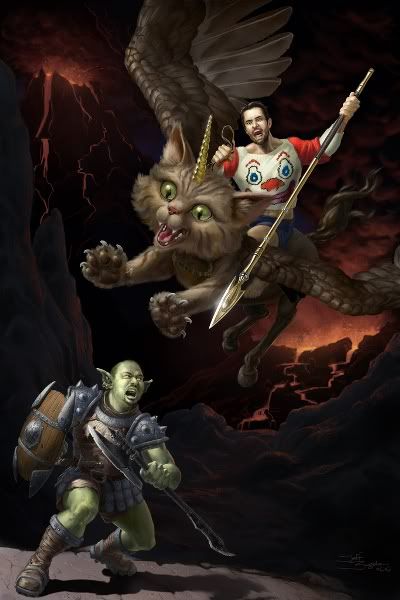
“Is someone making bacon?” The lone Scalzi orc gave several sniffs and abruptly abandoned his pursuit of the Evil One to search the human soldiers’ camp for any sign of the savory meat. He paid no heed to the gagging sounds the soldiers made when he passed into their sight, nor to the Evil One and his feline monstrosity, who were rapidly making their escape.
The captain of the soldiers groaned and hid his eyes from the green-skinned orc, lest he be sick again. How could he have been foolish enough to let the Evil One go? He even cheered for him as he flew away! Vainly he tried to rally his company. “Prepare another net! Bring him back down!” he ordered. The soldiers pulled themselves up and gave it their best but it was far too late. In the end, they could only watch helplessly as the Purrgasus and the Evil One disappeared into the distance.
“Curse you, Wil Wheaton!” the captain screamed, tears of hate and frustration escaping from his eyes. Though the object of his anger had vanished from sight, an obnoxious cackle was carried back to the captain on the foul-smelling wind. It was followed by the Evil One’s parting words: “Yes, I am that gooooood!”
Fifteen minutes earlier…
Mount Fail spewed its ash and cinders over the burning land for miles and filled the sky with stinking clouds of sulfur and ash. Below all this, in a slight hollow halfway down the volcano’s side, hid six dirty and weary soldiers. They had camped there for days now, holding their heads low and covering themselves with fireproof cloaks to guard against the flaming debris that floated down from the volcano’s mouth. It paid to be cautious on Mount Fail. Only that morning the seventh member of their company had rushed to be first in line for breakfast and neglected his protective cloak. The sight of his crimson uniform bursting into flames would give his fellow soldiers nightmares for years to come.
Their captain flicked away a small pile of accumulated ash from his cloak. “Not long now, eh lieutenant?” he said to the fresh-faced young man crouched next to him.
“Sir, are you sure this is a good idea?” asked his second-in-command, pulling his cloak tighter around his shoulders. “How can we possibly be a match for so much evil?”
“Oh come now! Have I ever led you wrong?” replied the captain. “The Evil One will come and we will capture him, I give you my word! As I always say, ‘He who is on the side of rightness…should watch out for his left!’” The captain laughed and clapped the lieutenant on the shoulder. The younger man spent a moment trying to understand the captain’s proverb before deciding that it was impossible.
“Something’s coming!” the lookout called from her position near the top of the hollow. She pointed to a creature emerging from the ring of smog that hugged the peak of Mount Fail. With a single deadly horn, two foul brown wings and a mouth crammed with cruel, needle-sharp teeth the legendary Purrgasus was unmistakable. On its back was a rider – the Evil One.
The captain jumped to his feet. “Ready the net!” he ordered. The soldiers scrambled to comply while their leader kept his eye on the man riding the flying beast. “Steady… Steady…” He watched him draw closer, waiting until he was just within range. “Now!”
The soldiers flung out the net and trapped the Purrgasus and its rider, pulling the struggling pair down to earth. The lieutenant and the lookout dragged the man out of the net while the others rushed to lash the hideous feline creature to the ground. Though it mewed pitifully, the captain was not moved. He knew that if given half a chance the Purrgasus would gleefully disembowel him. Ignoring the creature, he turned to the human prisoner.
“Let me go!” cried the bestubbled man, struggling against his captors as they removed a golden spear from his hands. Once the shining weapon was freed they passed it to the captain, who examined it briefly before responding to the prisoner’s plea.
“I think not, my friend,” the captain said. “The Traykee Purity Guardians will pay us a pretty penny when we deliver your head to them!” He poked the golden spear at the man’s neck.
“What?” The prisoner gulped.
“Are you hard of hearing?” asked the captain. Moving closer to the man he loudly replied, “I said, the Traykee Purists will pay us well for your head, Wil Wheaton!”
The man’s reaction surprised the captain. Instead of cowering in fear, he laughed. “Wheaton? You think I am the Wheaton?” He laughed again and shook his head, albeit carefully to avoid the spear still pointed at his neck. “I’m afraid there has been a misunderstanding – I am not Wil Wheaton.”
The soldiers looked at the man in confusion. Had they made a mistake? But their captain was not so easily swayed. “You’re a silver-tongued devil, Wheaton. How can there be any doubt that you are the Evil One? You’re just as the tales describe - riding on that feline monstrosity, carrying the golden spear of Epicosity and wearing the legendary Harlequin Sweater, knitted from finest mithril!”
The man nodded in agreement. “Yes, yes! And were I in your position I could only conclude the same. But please, let me assure you that in truth I am but a lowly orc. They call me John of the Scalzis, and my clan has been at war with the Evil One for eons. Why, it is only because of the trickery of the Wheaton that I appear before you thusly!”
The captain narrowed his eyes at the man and asked, “An orc? Do you take me for a fool?” He spat in disgust and pressed the spear tightly against the prisoner’s neck, causing the man to gasp.
“But I tell the truth!” he begged. “Only minutes ago I was battling the Wheaton at the pinnacle of Mount Fail. He was nearly defeated – all that remained was for me to remove his impenetrable Harlequin Sweater so I could stab him through the heart and utterly destroy him. However, no sooner did I pull the garment from his body than did the Evil One knock me to the ground and make his escape on foot! I was disheartened until I realized that, in his haste, he had left behind his creature, spear, and sweater. I took these things for my own and set off to find him.”
The captain shook his head and scoffed. “If you are a Scalzi orc, why do you look like a man? Where is your mossy green skin? Your pointy orc ears? Your splendid orc armor?”
“I see you are very observant!” the man replied. “It is obvious why you are the leader of this band.” The captain unsuccessfully tried to hide the smug grin that crept across his face. The prisoner continued, “Since you are such an intelligent man, I will let you in on one of the Wheaton’s greatest secrets. This enchanted Harlequin Sweater not only protects the wearer, but also disguises their appearance. When I removed the sweater from the Wheaton’s back he reverted to his true form – a horrible, putrid golem. And when I put the sweater on myself to replace my armor that the Evil One threw into Mount Fail, I was changed from an orc to a man!”
The captain pondered the prisoner’s story. Enchanted garments did seem to be packed with multiple magic powers these days. Why, just a few weeks ago he had come across the Mystical Mittens of Mott, which not only made the wearer invisible but also protected their fingers from frostbite. Perhaps the prisoner was telling the truth after all. He lowered the spear and the man gave a sign of relief.
The lieutenant noticed his superior’s change in attitude. He waved for one of the other soldiers to take his place holding the prisoner and came to the captain’s side. “Sir, should we not make him remove the enchanted sweater?” he asked. “That would prove beyond a doubt whether he is a Scalzi orc.”
The captain gave a great sigh. “You have much to learn, lieutenant. Of course we cannot.”
“But why?” the lieutenant asked.
“Tell me, have you ever seen a shirtless Scalzi?”
“No sir, I have not.”
“Then pray you never do!” The captain shuddered. “Now, please stop wasting my time and bring me the leftovers from breakfast.”
“Sir?” The lieutenant was bewildered.
“Don’t ask questions, just do as I say!” The lieutenant scurried away and returned several moments later carrying a platter filled to the brim with crispy, greasy bacon.
The captain took it from him. “Watch and you’ll see why I’m the one in charge here.” He stepped forward and offered the platter to the prisoner, saying, “Here friend, you must be—” but before he could add ‘hungry,’ the platter had been snatched from his hands and the prisoner was quickly devouring every last crackle. The captain gave a satisfied smirk. “You see?” he asked the lieutenant.
“See what, sir?”
“That you should never doubt me!” the captain answered. “Do you remember this old rhyme? Things made of meat, the Wheaton won’t eat…”
“But things made of pork are like catnip to orcs!” finished the lieutenant. “Of course!” He smiled for a moment, then frowned when another thought occurred to him. “But could not the Wheaton be acting? Pretending that he enjoys bacon so that we will believe his story?”
“Don’t be ridiculous,” the captain replied, watching the prisoner greedily lick the platter clean of grease. “Nobody’s that good.” He turned to the soldiers guarding the Purrgasus. “Cut it loose,” he commanded. To the prisoner he said, “I am deeply sorry for the misunderstanding, John of the Scalzis. You are clearly telling the truth and are free to go. We too wish to see the end of the Evil One, so may the gods shower good fortune upon you and your noble quest!” The captain held out the golden spear.
The man took it and replied, “Thank you, friend.” He mounted his feline steed and raised the spear in a salute. “I shall not fail!” At that, the Purrgasus beat its wings and the pair rose up into the burning sky.
“A cheer for the heroic orc!” the captain shouted and led the soldiers in a passionate “Hip, hip, hurrah!” They were so intent on their celebration that not one of them noticed when a real Scalzi orc appeared at the top of the hollow, wheezing and snorting in exhaustion from his run down the side of the volcano.
“Hey! Stop that guy!” the orc gasped between breaths. “Don’t let him get away!” Startled, the soldiers turned to look at the newcomer. That was a grave mistake, however, because the orc was wearing no shirt. Upon beholding that repulsive sight every last man and woman retched, heaving up the contents of their stomachs until the entire company lay weak and dazed on the ground.
The captain struggled to his feet but fell again when he caught another eyeful of the Scalzi orc’s chest. “In the name of all that is sacred, clothe yourself!” he cried.
The orc rolled his eyes. “Gee, I’d love to! But that jerk in the clown sweater stole my armor and threw it into Mount Fail!” The green monster roared in frustration at the departing Purrgasus and its rider, but stopped when his attention was caught by a smell rising from the stomach-churning mess in the camp. “Is someone making bacon?”
Friday, August 06, 2010
Printing Your Own Book
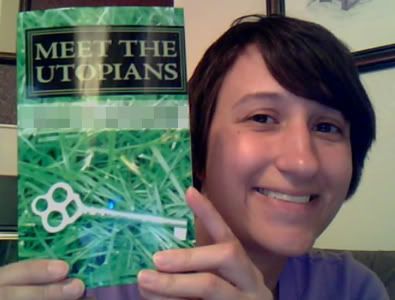
CreateSpace is an online self-publishing company affiliated with Amazon.com. It's free to get a basic account and publish a book as long as you do all the work yourself; you only pay for the actual printed copies. You upload a PDF of your book to the site, formatted exactly how you want it to appear in the final book including page sizes, numbers, etc. You create a cover for it, either by yourself or using one of their pre-formatted covers. For my book cover, I took a photo in my backyard (an antique key on some grass) and inserted it into one of CreateSpace's covers.
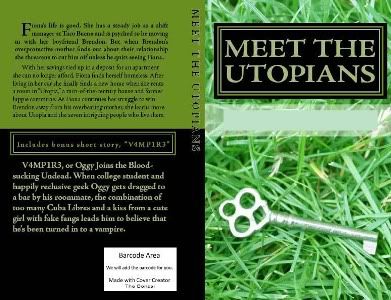
Next, someone at CreateSpace checks to make sure that your book will print correctly. It's a very basic check - mainly just to be sure that your PDF is the right size and nothing is going to be cut off on the edge of the page (they don't check for typos, missing pages or anything like that). Once your book has been checked you can order a proof copy. The cost depends on the size and page count of your book (mine was free thanks to NaNoWriMo, including free shipping!).
Your book is shipped to you, you check it over and if you're happy with it you can make it available for others to purchase at CreateSpace.com and Amazon.com. Or, if you're like me and you only want to have a copy for yourself, you don't have to make it available to purchase at all.
All in all I was happy with my free copy from CreateSpace. It was 224 pages long, which included my NaNoWriMo story plus a 43-page short short I threw in to make it a bit longer. I think the cover turned out nice, though you can see in the top photo that the front didn't turn out centered like it was in the second sample photo - it's cropped closer on the right side. Finally, the copy I got was a proof copy but the only place it said "proof" was on the very last page of the book. That's a good thing, because I was worried it was going to say it on every single page!
Thursday, June 17, 2010
New Website Name: www.craftycattery.com
I've been meaning to get a real (non-blogspot) domain name for this blog for a long time and I finally broke down and did it today. Now the web address matches the blog name!

You can still get here using the old web address (countingclocks.blogspot.com) if you need to. Why was it ever called Counting Clocks? I started this blog way before I got in to crafting and originally posted a couple of movie reviews and random rants about Dear Prudence and Dante Basco. I'm not sure why I decided to name it "Counting Clocks" then, I think it might've had something to do with liking that Coldplay song "Clocks". I think I wanted to name it "Ticking Clocks" after a lyric but that name was already taken, so I did "Counting" instead. When I decided to start a crafting blog, it seemed like a waste to create a new one from scratch so I just re-named it "The Crafty Cattery" but kept the original URL.
If you've been wanting to get a "real" domain name for your Blogger blog, I say go ahead and do it! Blogger makes it pretty painless, you can get everything done without even leaving the site and they took care of all the DNS pointing and other stuff I didn't understand. If you want to do it, just go to Blogger Help and search for "custom domain name".
Tuesday, June 15, 2010
Simplicity 2884 Halter Dress
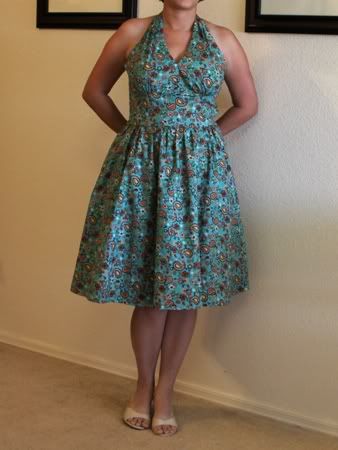
Project Name: Halter Dress
Time Taken to Finish: 3 days
Pattern: Simplicity 2884
Fabric Used: Turquoise paisley cotton, orange cotton for lining.
What I Did: I followed the pattern pretty much to the letter. The only thing I did differently was use cable ties for boning instead of the featherweight boning the instructions called for, because I don't have easy access to the featherweight boning where I live.
What I Liked About the Project: The fabric was very cute. Actually it's the whole reason I made the dress - I saw the fabric and had to find a dress pattern for it!
What I Didn't Like About the Project: The zipper is on the side instead of the back. If you look in the photo above you can see a funny bump in the dress at the waist on one side. That's the zipper. I don't know if I attached it wrong or if it's just bulging because the zipper doesn't want to lie flat. Either way, that really bothers me and is keeping me from actually wearing this dress. The only way I can think of to fix it is to move the zipper to the back or add boning to that side of the dress to keep things straight.
Monday, June 14, 2010
New "The Office" Paper Doll: Creed Bratton
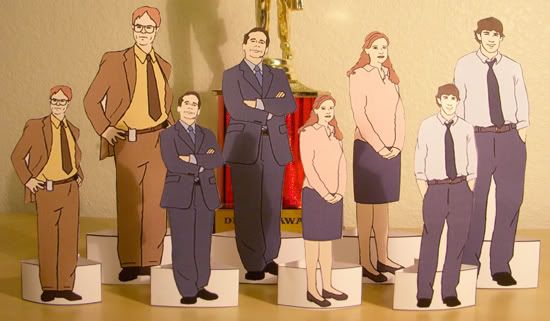
Last year I made paper dolls based on characters from my favorite television show, NBC's "The Office" (go here to print out dolls of Michael, Dwight, Pam and Jim).
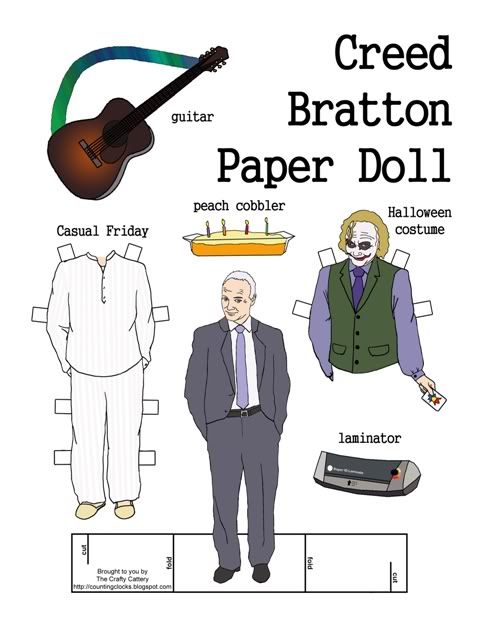
Now I've added a new doll: Creed Bratton! And unlike the other dolls, Creed has two alternate outfits (his Joker Halloween costume and Casual Friday clothes) as well as three accessories (peach cobbler, fake I.D. laminator, and guitar).
Here are the instructions for the doll:
1. Open the PDF file containing the paper doll (above) and print the page out (the stiffer the paper the better - cardstock would be the best).
2. Cut along the outline of the stand, around the paper doll and around the outfits and accessories (you may have to use an X-acto knife to get all the details). Cut two slits in the stand along the lines that say "cut".
3. Fold the stand back along both lines that say "fold" then slide the two slits into each other.
4. Stand the paper doll up. You may have to gently bend the figures and the stand so they'll stand upright.
Tuesday, June 08, 2010
Knitted Saguaro Cactus Pattern for Keychain
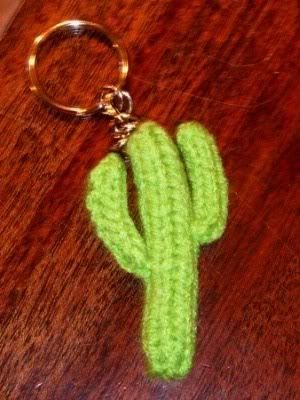
Knitted Saguaro Cactus Pattern
Note: My patterns are free and may not be sold. Please do not reproduce or repost patterns or instructions from CraftyCattery.com without my permission. For information on selling items created from my patterns, please view the FAQ.
Yarn: Medium weight, green (You can use any size yarn, just make sure to adjust your needles accordingly. I used very small needles because I didn't want any stuffing to show between the stitches.)
Needles: US size 3 double-pointed needles
All pieces are knit in the round. All stitches are knit stitches.
Body of the cactus:
Cast on 3 stitches and divide them evenly between your double-pointed needles (3 stitches).
Round 1: Increase each stitch 2 times (6 stitches).
Rounds 2-21: Knit all stitches for 20 rounds, stuffing as you go (6 stitches).
Don't cast off. Instead, run the tail of the yarn through the remaining stitches and tie off. Weave in tail.
Arms of the cactus (make 2):
Cast on 4 stitches. I found it easiest to use only two double-pointed needles, with two stitches on each needle (4 stitches).
Rounds 1-7: Knit all stitches for 7 rounds (4 stitches).
Rounds 8: Knit 2 stitches together twice (2 stitches).
Don't cast off. Instead, run the tail of the yarn through the remaining stitches and tie off. Do NOT weave in tail.
Construction:
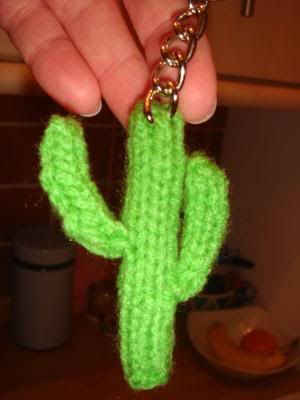
Using the yarn tail left on the arms, sew them to the body of the cactus. Tie securely and weave in tails. Attach keychain if desired.
Thursday, April 22, 2010
"The Office" Peeps Contest
Update 4/29: I can't believe it, my entry won first place! Thanks to everyone who voted for it and thanks to Officetally for holding this awesome contest. Even more unbelievably, Andy Buckley, the actor who plays David Wallace, commented on my diorama!
I'm a big fan of the TV show "The Office", so this year I decided to enter Officetally's The Office Peeps Contest. The goal was to recreate a scene from Season 6 (the current season) using marshmallow Peeps. Here's my entry:
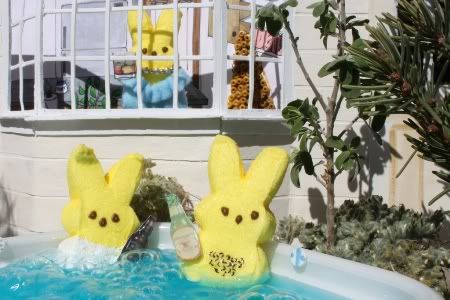

I thought I'd quickly detail how I made the diorama. It's sort of for my benefit, so I can remember how I made everything the next time I try to make something like this.
The Hot Tub. The hot tub was a plastic food container. I spray painted the back side white and hot-glued some foam "dials" on it. To keep the Michael and David Peeps in place I hot-glued nails to the inside of the container. The water is normal water with a little bit of blue food dye. To create the bubbles I had my husband standing off-camera with a straw. The straw had one end closed and I punched holes with an ice pick in the sides so it would make a lot of small bubbles.
The David Wallace Peep. When I tried to draw David's chest hair directly on the Peep it didn't work too well. The ink wouldn't come out easily and I ended up digging holes in the marshmallow. To fix this I dabbed some clear nail polish on the area and let it dry, then drew the hairs on.
The Michael Scott Peep. I used acrylic paint to give Michael a white shirt. I was bad and didn't let it dry before taking the photos so it quickly began to wash off. Oh well!
The Beer Bottles and Whiskey Glass. I found photos of the actual beers Michael and David were drinking in the scene, resized them to Peep size then printed them out on cardstock. I cut out the bottles and went over the fronts with hot glue to make them look three-dimensional. On the back I painted some clear nail polish so the paper wouldn't dissolve when it got wet, then glued on part of a paper clip so I had a way to attach the bottles to the peeps. I did the same thing for the whiskey glass.
The Greenery. These were all parts of plants and weeds from around my house. I thought using actual plants would look a lot better than trying to make fake plants.
The House. The walls were cardboard. The windowsill was made of popsicle sticks, the muntins (crosspieces) on the windows were plastic cable ties, and the siding is strips of construction paper that have been painted over.
Mrs. Wallace Peep. Her blouse is made of felt and the necklace is an actual necklace that I wired on to her.
Kitchen Backdrop. I drew the backdrop and colored it in with markers. If you look closely in the lower left corner of the window, you'll see a jar of marshmallow fluff that David used in an earlier scene to make a fluff sandwich. There's some sort of weird sculpture of little brown things in the original scene so I recreated it using seed beads painted brown.
The photo was taken outdoors. We had to do it in a rush because once the water went in the hot tub things started falling apart. I wish that I had noticed that there was a shadow of the top of the wall on the back of the kitchen backdrop, if I had I would've easily been able to fix it. Oh well! I'm pretty happy with my Peeps and I hope you liked it too!
Thursday, April 15, 2010
Sewing Project: Antique Wire Hamper Liner
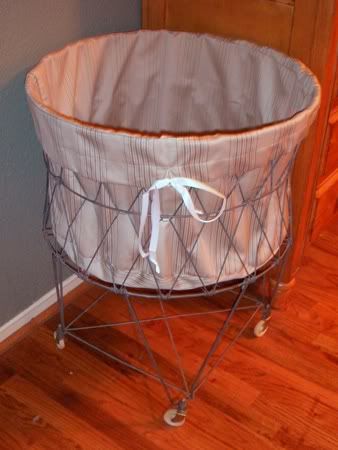
Pattern: Hand-drafted.
Materials Used: striped fabric, thread, twill tape for the tie
What I Did: Basically I made a cylinder out of fabric. The bottom is a circle and the sides were made of two flat panels sewn together. I folded over fabric at the top to create a space for the drawstring and so that the "good" side of the fabric would show when it was folded over the lip of the hamper.
What I Liked About the Project: It was fairly simple and didn't take much time to do.
What I Didn’t Like About the Project: The hardest part was matching the stripes on the vertical panels so that the pattern would look continuous.
Tuesday, April 13, 2010
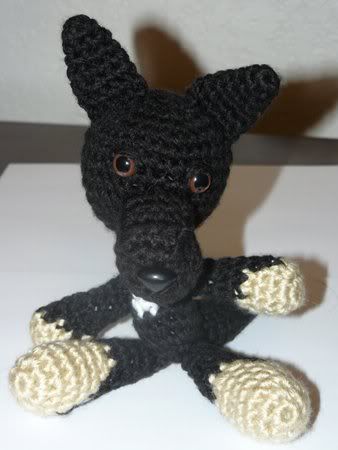
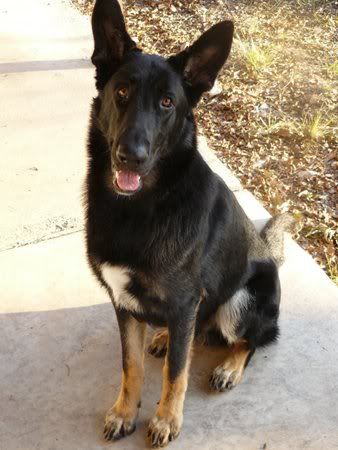
Crocheted Amigurumi German Shepherd
Thursday, March 18, 2010
Raised Vegetable Garden

I built this 95% by myself (my husband had to help with some of the heavy lifting) so I'm pretty proud of it. The frame is redwood. You can't see it, but before filling it with dirt we stapled hardware cloth (like chicken wire but with smaller holes) to the bottom so the gophers couldn't get in.
The instructions I used were from Sunset.com. They were perfect because the size, 4 feet by 8 feet, meant it fit very nicely in the space I had. The only problem I had with the instructions were that they told me to buy 1 inch galvanized tube straps to attach the 1 inch PVC to the sides of the bed. However, I discovered that when I tried to use the 1 inch tube straps they were not big enough to go around the PVC and reach the sides of the bed, so I had to go back and use 1-1/4 inch tube straps instead.
I'm spouting seeds inside and then transferring them outside. So far I've planted squash, green beans, and strawberries (those were bought already grown). I'll probably post some updates as things (hopefully) grow.
Tuesday, March 09, 2010
Crock Pot Carne Guisada Recipe
Carne guisada is one of my favorite Tex-Mex dishes. It's basically beef in a gravy and is usually served with flour tortillas. Now that I live in Arizona I can't find carne guisada in restaurants so I have to make it myself. I tried to use a pre-made spice mix but it always ended up too salty, so I've come up with my own recipe. As it is, it's pretty mild so if you like things a little spicier feel free to substitute hotter chiles or add more chili powder.
Crock Pot Carne Guisada
Ingredients:
- 1 pound stew beef (chuck or round steak cut in to cubes)
- 1/2 onion, chopped
- 1 green chile deseeded, deveined, and chopped or 1 can green chiles, drained
- 4 cloves garlic, chopped
- 1/4 cup flour
- 1 tsp cumin
- 1 tsp chili powder
- 1 tsp salt
- water
Dump beef and veggies into the crock pot. Mix spices and flour in 1 cup of water until mostly dissolved, then pour the mixture into the crock pot. Add more water until the meat is nearly covered. Put the lid on the crock pot and turn it on. Cook on high for 6 hours or low for 8 to 10 hours. Gravy will thicken as it cools, but if it is too thin you can a little more flour.
Serve with flour tortillas.
Tuesday, February 16, 2010
Single Crochet Kimono Style Baby Sweater
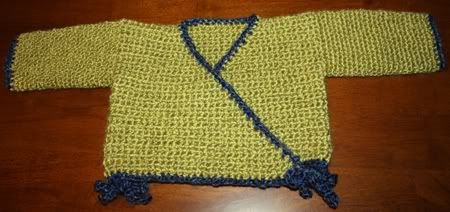
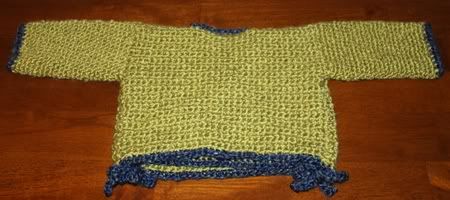

The body of the sweater consisted of three pieces: two trapezoidal front panels and one rectangular back panel.

I started crocheting the front panels at the shortest edge, N. I increased gradually every few rows, always on the same edge so that one side would slope and the other side would remain straight. I continued increasing until the width of the front panel was equal to W and the height was equal to H.
This is what I ended up with:

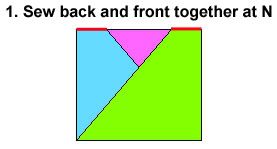
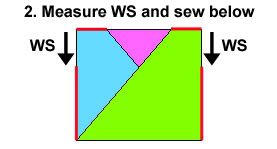
On each side of the sweater, I started at the shoulder seam and measured down the amount given by WS to determine how much space was needed for the sleeves. I marked that with a stitch marker and then sewed from there down to close up the side seam.
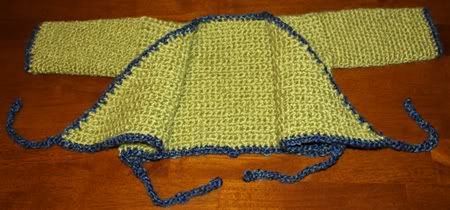
After finishing the ends, I turned the sweater right side out. Using a contrasting color of yarn, I added a row of single crochet to the ends of the sleeves. I did single crochet around the edge of the body of the sweater as well, and while doing that edging I made the four ties that keep the kimono shut. Whenever I reached one of the shoulder seams or the bottom corners of the front panels, I made a chain of about 20 stitches, slip-stitched back down the chain and then continued on the with the edging:
Wednesday, January 06, 2010
Amigurumi Nativity: Crocheted Mary and Baby Jesus
For Christmas this year, I made this amigurumi Mary and baby Jesus for my friends and family. My plan is to make a new pattern every year for a different figure (Joseph, shepherds, wise men, animals, angel, etc.) so that after several years they will have a complete amigurumi nativity scene. This is the first year I'm doing it so this is the only pattern I have come up with so far.
Amigurumi Pattern
Notes on this pattern:
- My patterns are free and may not be sold. Please do not reproduce or repost patterns or instructions from CraftyCattery.com without my permission. For information on selling items created from my patterns, please view the FAQ.
- There are a few color changes in this pattern. Aside from that, the most complicated part of the pattern to crochet is the swaddling, where you must switch from continuous crochet to flat crochet, and Mary's veil which is crocheted flat.
- The finished size of the pair of figures is 5 inches.
- Bulky weight yarn in a flesh color, white (for veil and swaddling), and blue (for Mary's dress). I used Lion Brand Jiffy.
- Size H (5.00 mm) crochet hook
- Yarn needle
- Stuffing
- Optional: Bean bag plastic pellets. Putting some of these in the bottom of the Mary figure can help it balance better. Make sure the pellets are large enough that they won't work their way through the crochet stitches. Pellets are not recommended if small children may have access to the figure.
- Rnd = round, when doing continuous crochet
- Row = row, when doing flat crochet
- sc = single crochet
- st = stitch
- sts = stitches
- ch = chain
- sc2tog = single crochet two stitches together, aka a decrease. (I recommend using falwyn's invisible decrease.)
Baby Jesus' Head
Using flesh color:
Rnd 1: 6 sc in magic ring (6 sts).
Rnd 2: 2 sc in each st around (12 sts).
Rnd 3: sc around (12 sts).
Rnd 4: [sc2tog] six times (6 sts).
Bind off, weaving in tail.
Baby Jesus' Swaddling
Using white:
Rnd 1: 3 sc in magic ring (3 sts).
Rnd 2: 2 sc in each st around (6 sts).
Rnd 3: 2 sc in each st around (12 sts).
Rnd 4: sc around (12 sts).
Rnd 5: sc around (12 sts).
Rnd 6: sc around (12 sts).
Rnd 7: sc around (12 sts).
Rnd 8: sc around (12 sts).
Rnd 9: sc around (12 sts).
Switch to flat crochet:
Row 10: sc in each st for 8 sts, ch 1 turn (8 sts).
Row 11: sc2tog, sc 4, sc2tog, ch 1 turn (6 sts).
Row 12: sc2tog, sc 2, sc2tog, ch 1 turn (4 sts).
Row 13: sc2tog, sc2tog. (2 sts).
Bind off, weaving in tail.
Stuff the head and the swaddling. Put the open end of the head just inside the open end of the swaddling and sew them together.
Mary's Veil
Crocheted flat. Using white:
Row 1: ch 11. sc in second chain from hook. [sc in each chain] eight times (with first sc, a total of 9 sc). In 10th chain, 4 sc. Work back down the other side of the chain doing sc in each chain (total of 9 sc), ch 1 turn (22 sts).
Row 2: sc 9, 2 sc in next 4 sts, sc 9, ch 1 turn (26 sts).
Row 3: sc 9, 2 sc in next 8 sts, sc 9, ch 1 turn (34 sts).
Row 4: sc across, ch 1 turn (34 sts).
Row 5: sc across, ch 1 turn (34 sts).
Row 6: sc across, ch 1 turn (34 sts).
Row 7: sc across, ch 1 turn (34 sts).
Row 8: sc across, ch 1 turn (34 sts).
Row 9: sc across, ch 1 turn (34 sts).
Bind off, weaving in tails.
Here are some photos detailing how to start the veil.
Row 1 cont'd - In 10th chain, 4 sc:
Row 1 cont'd - Work back down the other side of the chain doing sc in each chain (total of 9 sc), ch 1 turn:
Row 2 - sc 9, 2 sc in next 4 sts, sc 9, ch 1 turn:
Keep working back and forth according to the pattern. Here is the final result:
Make two. Begin with flesh color:
Rnd 1: 4 sc in magic ring (4 sts).
Rnd 2: [2 sc in next st, sc 1] two times (6 sts).
Rnd 3: sc around (6 sts).
Color change to blue:
Rnd 4: sc around (6 sts).
Rnd 5: [2 sc in next st, sc 1] three times (9 sts).
Rnd 6: sc around (9 sts).
Rnd 7: sc around (9 sts).
Rnd 8: sc around (9 sts).
Rnd 9: sc around (9 sts).
Rnd 10: sc around (9 sts).
Bind off, leaving tail to use to sew arm to body. Stuff arm.
Mary's Head and Body
Beginning with flesh color:
Rnd 1: 6 sc in magic ring (6 sts).
Rnd 2: 2 sc in each st around (12 sts).
Rnd 3: [2 sc in next st, sc 1] six times (18 sts).
Rnd 4: [2 sc in next st, sc 2] six times (24 sts).
Rnd 5: [2 sc in next st, sc 3] six times (30 sts).
Rnd 6: sc around (30 sts).
Rnd 7: sc around (30 sts).
Rnd 8: [sc2tog, sc 3] six times (24 sts).
Rnd 9: [sc2tog, sc 2] six times (18 sts).
Rnd 10: [sc2tog, sc 1] six times (12 sts).
Color change to blue:
Rnd 11: sc around (12 sts).
Rnd 12: [2 sc in next st, sc 3] three times (15 sts).
Rnd 13: [2 sc in next st, sc 4] three times (18 sts).
Rnd 14: [2 sc in next st, sc 5] three times (21 sts).
Rnd 15: [2 sc in next st, sc 6] three times (24 sts).
Rnd 16: [2 sc in next st, sc 7] three times (27 sts).
Rnd 17: [2 sc in next st, sc 8] three times (30 sts).
Rnd 18: [2 sc in next st, sc 9] three times (33 sts).
Rnd 19: sc around (33 sts).
Rnd 20: [2 sc in next st, sc 10] three times (36 sts).
Rnd 21: sc around (36 sts).
Rnd 22: sc around (36 sts).
Sew arms to body underneath head. Stuff head and upper part of body (stuffing it partially now is easier than trying to stuff the whole thing as you are closing it up).
Rnd 23: [sc2tog, sc 4] six times (30 sts).
Rnd 24: [sc2tog, sc 3] six times (24 sts).
Rnd 25: [sc2tog, sc 2] six times (18 sts).
Rnd 26: [sc2tog, sc 1] six times (12 sts).
Stuff the rest of the body. Add plastic bean bag pellets if desired.
Rnd 27: [sc2tog] six times (6 sts).
Bind off, closing hole and weaving in tail.
Final Construction
Sew veil to Mary's head. Add hair if desired. Sew baby Jesus to Mary's hands. Enjoy!

