Tuesday, September 18, 2012

No Sew Master and Commander Jack Aubrey Costume

JoeRanger in his Jack Aubrey costume
JoeRanger's Jack Aubrey Costume
People sometimes tell me that, since they can't sew or don't have a machine, they can't make a costume. Well, this post proves that you don't have to sew to make a great costume!

JoeRanger, the creator of this costume, contacted me a few weeks ago to let me know that he had made a Jack Aubrey costume like mine for a party, only he did it with no sewing! I was impressed and asked if I could post about it here to give some ideas to others who might want to make a costume without having to sew. He said yes and sent me these photos.
Left: A reproduction Royal Navy uniform from DeborahLoughCostumes on Etsy. Right: JoeRanger's uniform and accessories.
It's not easy to find an inexpensive Royal Navy costume online. Most of them for sale out there are historically accurate reproduction uniforms meant for films or reenactors and cost thousands of dollars. I have a feeling that's way above the budget of most people who find this blog, who are looking for something inexpensive they can wear for a party, Halloween, a convention, etc. Most of the supplies JoeRanger used were scrap, thrifted or purchased on eBay; in total it looks like it cost him around $50.

Supplies
For Jack's uniform coat, he started with a 60/40 cotton/polyester tan trench coat ($9) and dyed it a dark royal blue with Rit liquid dye.
Costume before adding trim and buttons
He cut the trench coat to match the shape of Jack's coat which meant cutting away the lower front parts of the coat. I believe he folded the raw edges inside and glued them together with hot glue.
Costume with trim and buttons
The trim and buttons (plastic with anchors; $5 from eBay) were glued on as well. An alternative would be to use iron-on fusible tape to finish the edges, which could also be used to attach the gold ribbon trim.
Trench coat lining and excess pant material remade into a vest
For the pants, he found a pair of khaki pants for $4. He cut them off at the knee and used the extra to alter the liner that came with the trench coat so it looks like Jack's vest.

JoeRanger's progress photos
The shirt was an old dress shirt with fabric glued on the front, the boots were left over from a Han Solo costume ($30 on eBay) and he constructed the pistol and sword from scrap in his workshop.

Thanks for sharing, JoeRanger! I hope that these photos are enough to show those of you out there who want a Jack Aubrey costume that, if you're willing to get creative and put in some effort, you can find a way to make an inexpensive costume without having to sew.

Monday, September 10, 2012

Top Gear, MST3K and Arrested Development Etched Pint Glasses

First of all, let me say how difficult it is to take photos of etched glasses! I did my best but the photos below aren't great and don't reflect how they look in real life.

Top Gear
"Rawsdower saves us and saves all the world!" from Mystery Science Theater 3000 episode "The Final Sacrifice"
"Big McLargeHuge," "Punch RockGroin" and "Buff DrinkLots" from Mystery Science Theater 3000 episode "Space Mutiny"
"Illusion, Michael" from Arrested Development
My brother just finished his master's degree and the Mystery Science Theater 3000 glasses were for him. The Top Gear and Arrested Development glasses went to my husband on his birthday.

I used this tutorial from The Yummy Life which explains how to do the lettering and this video from ashram6 on Youtube which shows how to use adhesive contact paper to make images.

Supplies needed are:
  • etching cream (at any craft store),
  • pint glasses (I found individual glasses for less than a dollar each at Bed Bath and Beyond)
  • letter stickers (the smallest ones I could find were in the dollar bin at Target)
  • adhesive contact paper (usually found with shelf liners in home stores)
  • painter's tape (I used Frog Tape)
  • popsicle sticks
  • safety glasses and gloves
I'll explain the process briefly, but see the tutorial and video above for more details.

How it's done:
  1. Clean the glass thoroughly with rubbing alcohol and try not to touch the glass afterward.
  2. Place the letter stickers on the glass to form words. Make boxes around your words with painter's tape.
  3. For images: Draw or print out an image the size needed. Trace the image on to the contact paper, cut out and put on the glass. Use painter's tape to box off any negative space around the image.
  4. Make sure everything is stuck on well so the etching cream won't sneak underneath.
  5. In a well-ventilated area (this stuff stinks!), put on your safety gear and use a popsicle stick to put the etching cream on the glass. Leave it on for about five minutes, using the stick to move the cream around twice during the wait.
  6. In a stainless steel sink (the cream can damage other types of sinks), wash off the etching cream with hot water and remove all the tape and stickers. Wash the glass and you're done!
Etching cream isn't perfect and the results won't look store-bought. You can tell from my photos that it doesn't etch evenly. The bigger the area you try to etch, the more evident the unevenness is. The etching cream is caustic and dangerous so it's not a good project for kids, though they could decorate a glass and then an adult could take over when using the cream. Still, with some planning and patience a custom etched pint glass can make for a unique personalized gift.

Tuesday, September 04, 2012

Craftsman-Style Lamp Makeover

Before and After

Though we've been out of college for years, my husband and I are still using those cheap flexible desk lamps next to our bed. Now that we're only a few months away from moving into a new home, I thought it was time to invest in some actual lamps.

I saw the below lamp online and fell in love. It's a custom pottery lamp with a mica shade made by William Morris Studios.


They don't list a price which to me says that it's probably more than I'm willing to pay, so I decided to try to make something similar. I found the brass lamp and paper shade in the top left photo at Target. I thought about buying a lamp with a mica shade there, but the reviews I read online said that the cheaper mica shades sometimes melted or caught fire so I decided against it!

Step 1
Step 1: I taped and covered the parts of the lamp I didn't want painted, then gave it a couple coats of Krylon Primer in white.
Step 2
Step 2: After letting the primer dry, I gave the lamps several coats of Krylon Satin in Jade. I let them dry overnight.

Step 3
Step 3: The spray painted color was okay, but I wanted it greener and I also wanted to give it some depth and texture. I tested out some mixing glaze on an old cookie tin and didn't like the way it looked. I ended up using watered-down acrylic paints and mixed my own color.

I dabbed the paint on to the lamp with a sponge then spread it around with a rag while wiping off the extra. It took practice to get an even coat. I screwed up the first time and ended up with an unfixable splotchy mess but I just spray-painted over it and tried again.

Step 4
Step 4: I added some touches of gold using Liquid Leaf metallic paint in Florentine Gold. Once it dried, I did a top coat of Valspar Perfect Finish clear sealer in Satin. I'm not 100% happy with the sealer as it gave the lamps a bumpy texture, but it's only noticeable to the touch and looks okay.


I'm still debating about the lampshade. It would be great to have a mica shade instead of paper but I doubt I will be able to find one that I can afford and that will fit the lamp. I would like to add ginkgo leaf details like in the Morris lamp, but I can't find a way to do it that looks good and will not be affected by the heat of the bulb. Acrylic paint gets soft with heat so that's out. I've experimented with stencils and ink on paper bags but I didn't like the way it turned out. I think decoupaging real or cut-out leaves on to the shade would look best but I don't know how well that would hold up with the heat from the lamp. I think I'll use the shades as they are for a while and see how I like them.

Friday, August 31, 2012

Beary Jackson Amigurumi Bear


Here's the sixth bear I've made from the Beary Jackson pattern at Rheatheylia.com. I don't have the time or the patience to make baby blankets for all the babies in my life, so this is a great alternative that only takes me about a day.

This time I went with a chunky yarn in an off-white (I threw away the yarn wrapper already so I don't have the name). I guess I forgot since the last time I made Beary that using a heavyweight yarn makes for a very large bear. I had to redo the head to make it smaller so I would have enough yarn to finish! I would recommend using no heavier than worsted weight yarn. My favorite yarn I've used so far was the Red Hearts Baby Teri I used on this bear. Unfortunately it's no longer being made and I haven't found a good replacement.

I'm torn about how to do the eyes and nose on the bear. On this bear and the one before it, I embroidered on a fleece nose and eyes because it seems the less dangerous alternative to buttons or even safety eyes, which can easily be pulled out between loose crochet stitches. On the first bears I did the eyes and nose with embroidery only, which seems to work better on smaller bears. I'm not sure which option looks better.


Tuesday, July 10, 2012

Thor Puppy


My friend's son turned four today and I was invited to his party. When we asked about gifts, my friend said that he liked puppies and the movie The Avengers. I decided to combine the two and voila, we have Puppy Thor!


The stuffed dog is from Cabela's. The outfit was made entirely by me. It took about three days of sewing to finish. I really didn't think it would take that long when I started!


I hand-drafted the pattern for the shirt. It's black pleather and, since it doesn't come off, I didn't bother lining it. The cape is satinette, gathered at the shoulders.


The buttons are "cover buttons" and are covered with two layers of a semi-sheer silver fabric. I attempted to use the same silver fabric as the helmet but it tore when I tried to attach the button backs.


This is the back of the shirt, underneath the red cape. You can see the decorative top-stitching well here.


The helmet is silver foil pleather. It is very fiddly to work with and the silver part tears easily. I started with a child's yarmulke pattern on Yakityak.com and shrunk it 75%. I added the point at the front, the cone on the top, the wing side-shields and some elastic to keep it on Puppy Thor's head.


I got lucky and found a half-scale papercraft version of Thor's hammer on Tektonten Papercraft's blog which I was able to modify as a sewing pattern. I also shortened the handle an inch or two to make it more in scale with the dog.

I was very sad to have to give Puppy Thor away, but his new owner seemed very happy to have him!

Thursday, June 07, 2012

South Park Doll: Kenny and Mysterion

Kenny McCormick from South Park
 Here's the felt doll I made of Kenny McCormick from South Park. I got tired of waiting for the family photography expert to take some photos, so we'll have to make due with ones I took.

Mysterion
 I'm sure most people know Kenny as the guy in the orange parka, but he also has a secret super hero identity - Mysterion. His super power? He can't die.

Kenny's superhero identity, Mysterion
Up until a few years ago I would've said Kyle was my favorite kid from South Park, but after the introduction of Mysterion I've switched my favoritism to Kenny. Mysterion is just too awesome!

Kenny without his hood
Since I was making Kenny's outfit changeable, I wanted to show his face too. Because I had to fit his hair in under his hoods, I couldn't give him as much as he has in the show.
Kenny's base body
This is what the doll looks like without the removable pieces. When his orange parka is on only the orange pants are visible and when he's wearing his Mysterion boots the orange pants are covered up. I'm not super happy with the way his chin puckers, but it was the best I could do.
The removable pieces
Below are my drawings that I used as a pattern to make the doll. See my IT Crowd Dolls for more information on how I make these dolls.

Orange Parka


Mysterion
Base Body

Thursday, May 10, 2012

Updates: House-Buying, Saguaro, Blanket, Doll and More

Photobucket

I don't usually do updates but there are a few little things I feel like I should mention so... I'm going to mention them!

House-Buying Update: We are still buying a house but its going to take longer than we thought. Expect not to hear anything from me for a couple months this fall while we move.

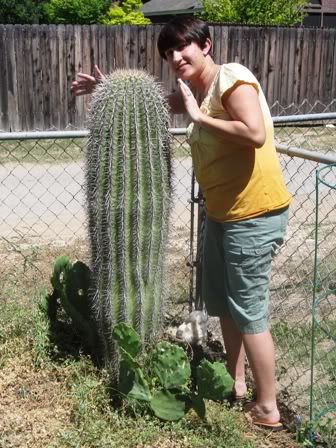
My Texas Saguaro: I visited my parents last month and took another photo of the saguaro cactus in their yard (above). It's still growing like crazy (previous pictures are here).

Pixel Art Blanket: I've got two or three more rows finished on the Mario blanket, but not enough to bother posting a photo. I have made a video that shows the method I'm using to attach the granny squares to the blanket as they are made (instead of sewing them together afterward) but I don't know if I should post it now or wait until the whole thing is finished.

South Park Felt Doll: I've made a felt doll of Kenny from South Park, like the IT Crowd dolls I made a few months ago. Kenny's hood comes off so his face can be seen and there is an alternate Mysterion costume (Mysterion is Kenny's superhero alter-ego). I need to get my husband to take some good photos of him and then I can do a post.

Special Project That May or May Not Happen: I've been asked to do a project that has me incredibly excited, but at this moment I'm not sure if it's actually going to happen. I would feel silly if I posted about it and then nothing ever happened, so I'm going to force myself to wait until I know for sure. So if it does happen, you'll hear about it ASAP. But if I never mention it again, you can assume it fell through. Fingers crossed that it doesn't!

Monday, March 12, 2012

On Hiatus Again

Photobucket Photobucket
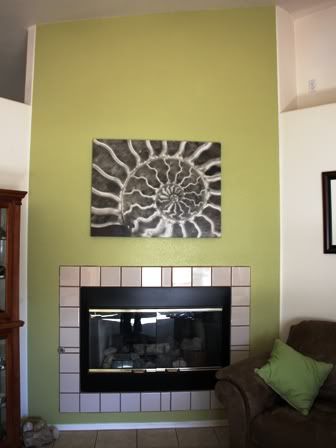
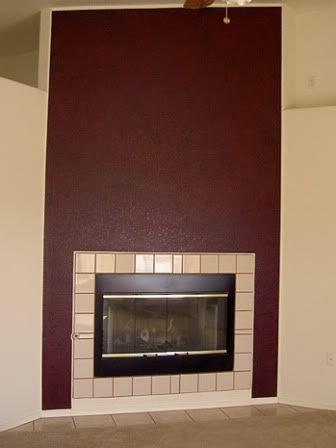
Fireplace, before and after

My fingers are crossed that by the time this posts, our house in Arizona will be one hundred percent no longer ours. It was a nice little house and we were finally getting it the way we liked it (see above) when the move happened. I hope the buyers will enjoy it as much as we did, and that they don't hate my choices in paint colors!

Now that it has sold, that means it's time for us to find a place to live in Salt Lake City (and get out of this %$#@ apartment!). The amount of options here compared to where we lived in Arizona is frankly overwhelming. There are 15 towns/suburbs that are in a comfortable commuting distance from my husband's office and according to Zillow, there are about 1500 houses in those areas in our price range. It's hard to even know where to start!

All these big decisions we have to make and another move that has to happen means that over the next few months I will have absolutely no time or brain power left to devote to blogging. Instead of feeling bad about my blogs languishing alone and unloved, I'm going to put them on hiatus for a few months until things get back to somewhat normal. But if you need anything, feel free to leave a comment or contact me - I'll still be around.

Saturday, February 25, 2012

What Am I Making?

Photobucket

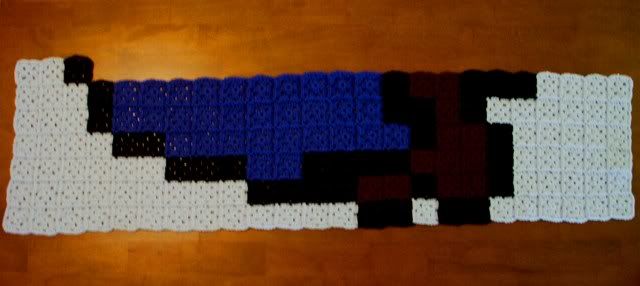
Let's play a game - it's called, "What in the Heck is Cat Making Now?" Look at the photo above and see if you can figure out what I'm making. Yes, those are granny squares but it's not your typical granny square blanket. So what is it? The only hint I'll give is that I've completed six out of twenty-seven rows, and the bottom row in the picture will be the bottom row in the blanket.

Leave your guesses in the comments and if I've already told you what it is, please keep it to yourself. If no one gets it, I'll continue to post more photos of my progress until someone figures it out.

Thursday, February 09, 2012

IT Crowd Dolls: Moss, Jen and Roy

Photobucket
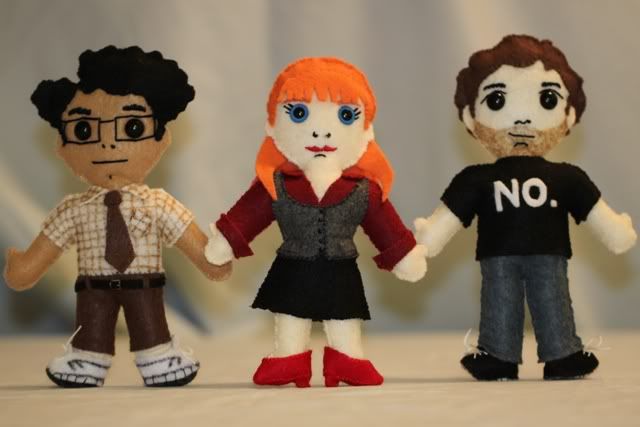
Moss, Jen and Roy Dolls
Photobucket
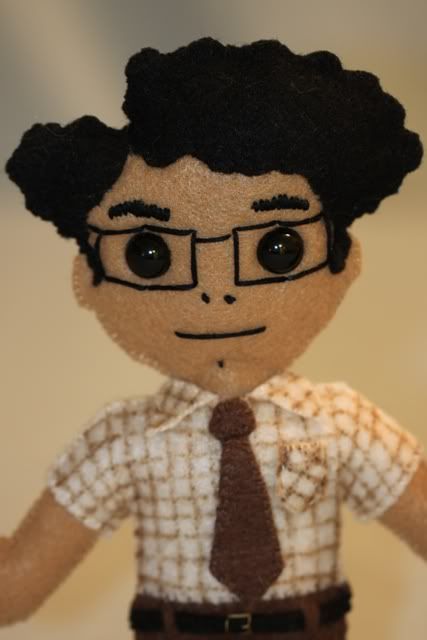
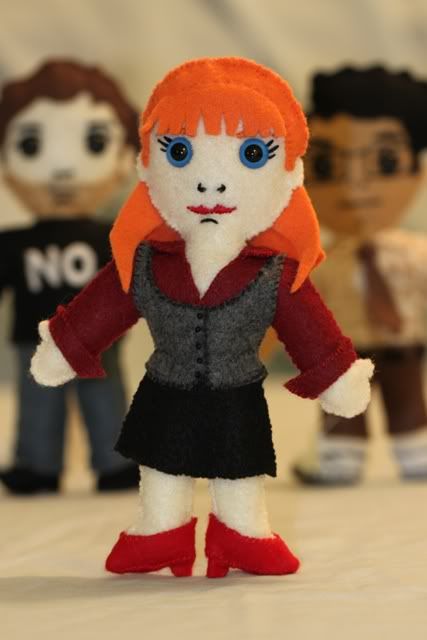
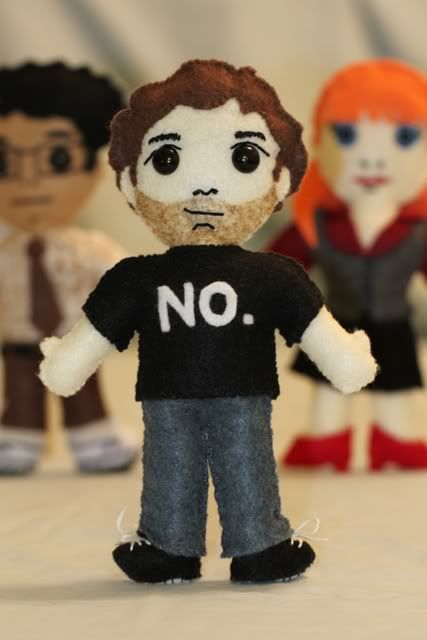
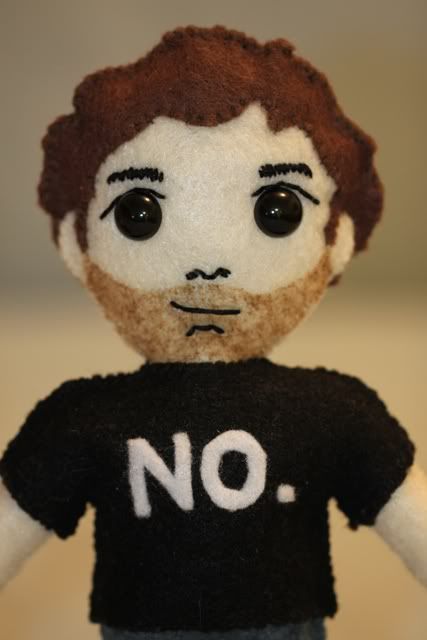
Moss, Jen and Roy from The IT Crowd
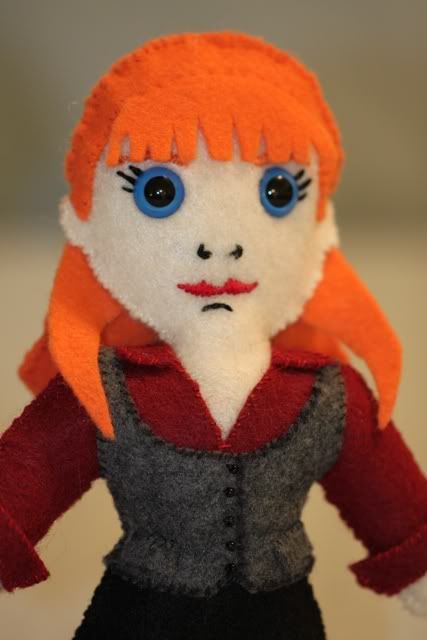
Back in January I made a felt doll of Moss from the British sitcom The IT Crowd and now I've made his office mates Jen and Roy. The dolls are "cute" versions of the characters (the geek part of me wants to use the anime terms "chibi" or "super deformed"). I got my husband to use his fancy camera to take a bunch of glamor shots of them for me. Scroll down past the photos for construction information.

Photobucket
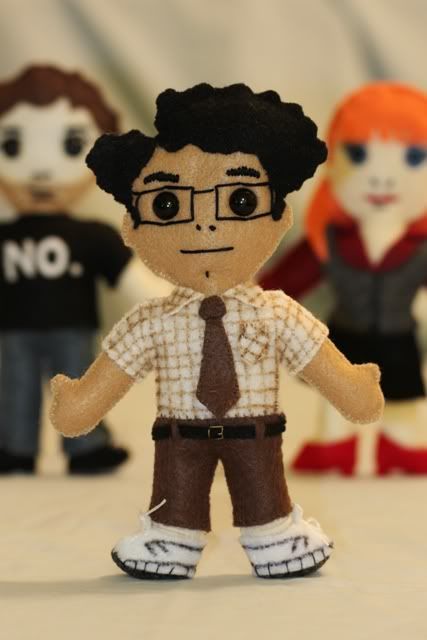
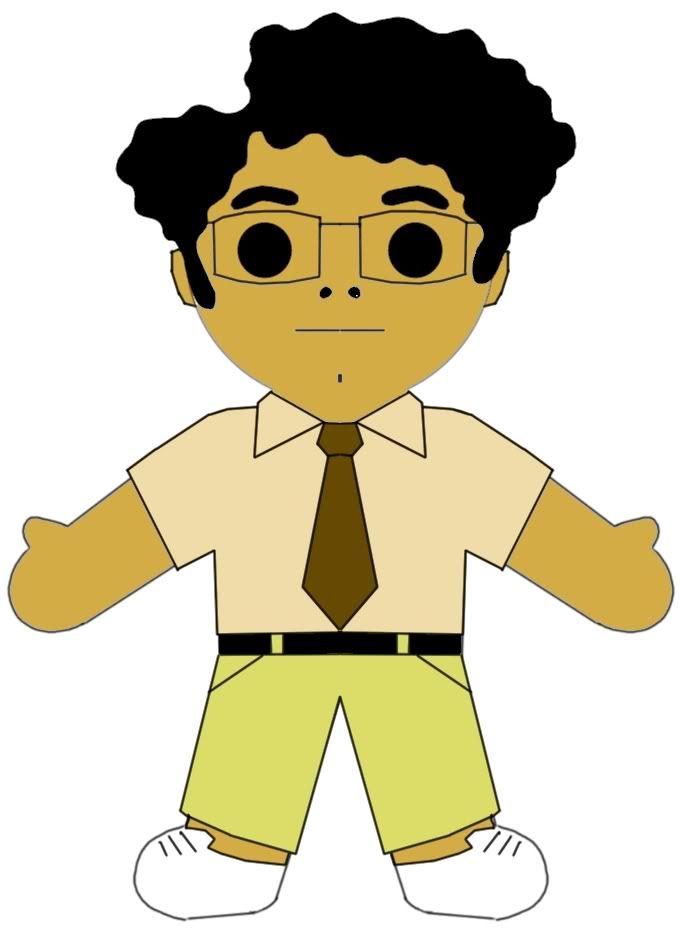
Maurice Moss. It's hard to see, but he even has wrinkly socks made out of panty hose.
Photobucket
Moss
Photobucket
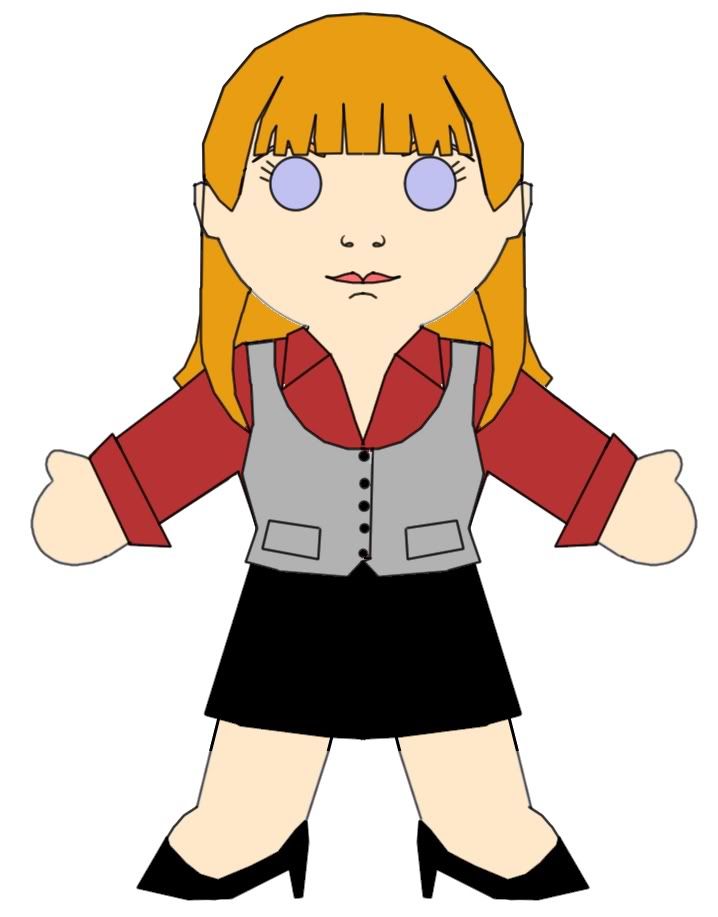
Jen Barber, with the too-small red shoes she squeezed her feet in to in "Calamity Jen."
Photobucket
Jen
Photobucket
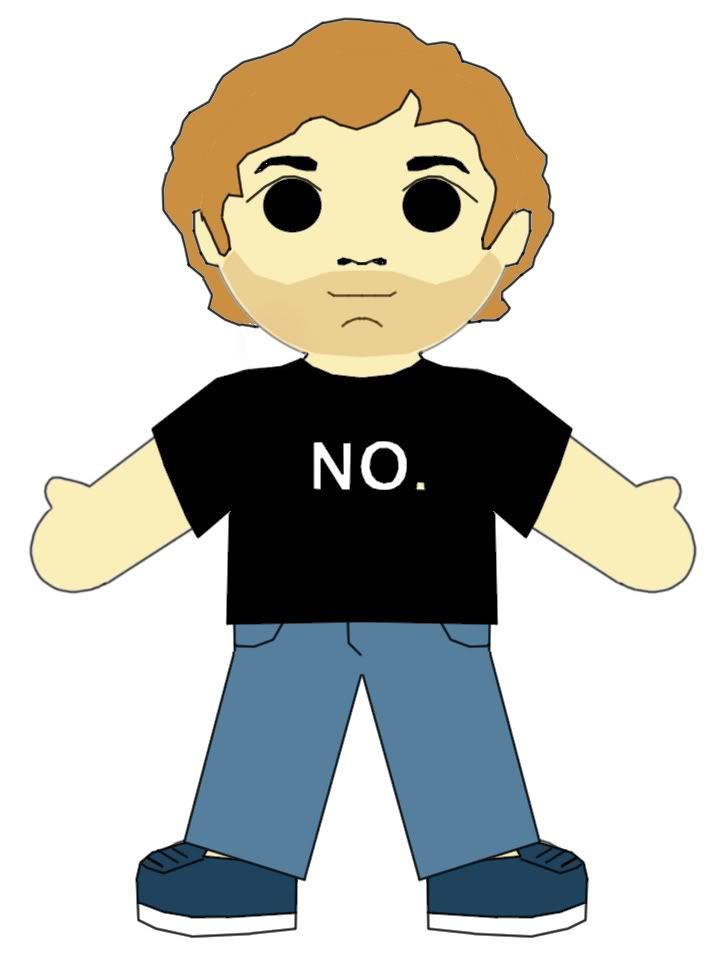
Roy Trenneman, who always needs a shave.
Photobucket
Roy
I used a very simple method to make these dolls.
How I made the pattern:
  • I started with a blank doll body and sketched the clothes, hair and face on to it by hand.
  • I scanned the drawing in to the computer, cleaned it up and colored it, then used the color drawing as my pattern.
  • I had to do a little bit of adjusting to make the clothes fit over the stuffed body (usually just scaling them up a few percentage points on the computer) and the shoes required their own patterns, which I have included below.
How I sewed the doll:
  • I used a whip stitch for all of the stitches.
  • The fabric was sheets of synthetic felt, available for around thirty cents a sheet from most craft stores.
  • Roy's stubble and the stripes on Moss' shirt were drawn with colored permanent markers.
  • Using the blank doll pattern, I cut out the body from two pieces of felt. I embroidered the face on, attached the eyes then sewed the two pieces together around the edges, leaving the top of the head unsewed. I stuffed the body.
  • I cut out the hair and sewed it to the head, stuffed the head, then sewed everything closed.
  • I cut out the clothes from felt, added any details and sewed them on over the body. They're not removable.
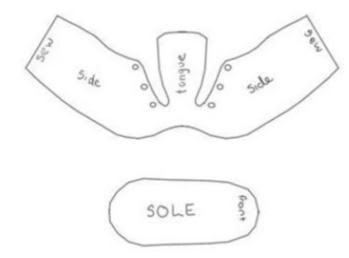
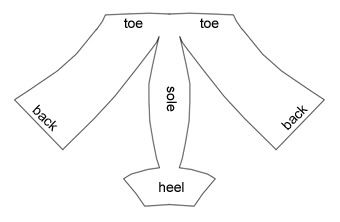
  • I made the shoes using the patterns below. Originally I tried to make the shoes flat like the rest of the clothes, but they didn't look right. After a lot of experimenting I came up with the sneakers and high heels patterns below.
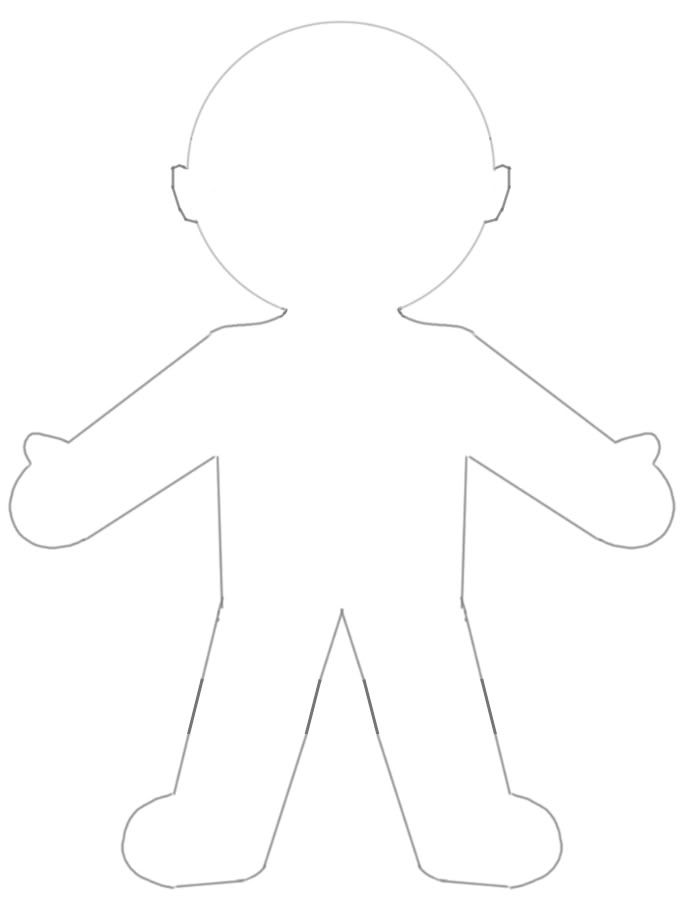
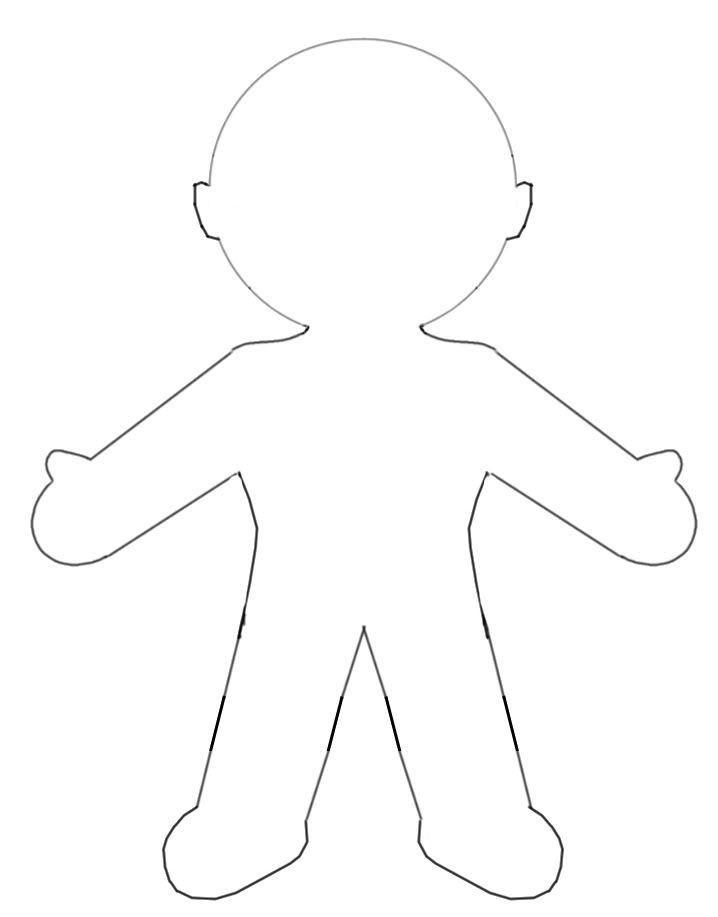
Here are the drawings I used as patterns, the blank body patterns and the shoe patterns.

Photobucket
Moss drawing
Photobucket
Jen drawing
Photobucket
Roy drawing
Photobucket
Blank body - male
Photobucket
Blank body - female
Photobucket
Sneaker pattern (sew together the two sides marked "sew" then sew the sole to the shoe)

Photobucket
High-heeled shoe pattern (sew the toe and the back together, sew the sole to the bottom of the shoe then sew the top of the heel to the bottom of the sole)

I hope to make dolls of two more characters, Douglas and Richmond, at some point, but it is very likely we'll be moving in the next few months so we'll see how soon I get around to it.

Related Posts with Thumbnails